Do you have a website or domain name and want to create a free professional business email address? Then here is the way to do that using the free Zoho Professional Business Email service.
Having an email address with a domain name that reflects your business not only seems professional but also increases the trust of consumers or users. Therefore, if you are a blogger or just a small startup that doesn’t want to spend money on getting a business email address then either they can use their hosting service or a popular CRM service provider Zoho.
Zoho is known for its CRM services but it is not limited to that only. They let us use our business domain name to create a business email address on their email service for free.
What do you get with Zoho?
The reason to go for Zoho is that in the free plan they are providing up to 25 free business accounts, all with up to 5GB of data. You also get access to all of the Zoho Online Office apps. I would say that most small to medium-sized businesses would be perfectly happy with it.
Let’s start with steps to get registered with Zoho for getting a free business email. To follow this tutorial you must have a domain that you want to use in your email address instead of Zoho. And also you need to have the access of the DNS Server of the same which usually available on the page of the Domain registrar from where you have bought the domain.
So, basically you don’t need a website or hosting to have a business email address but yes at least the domain that you want to use. For that, you can simply buy a domain from any Registrar online and then follow the below steps.
Step 1: Register with Zoho
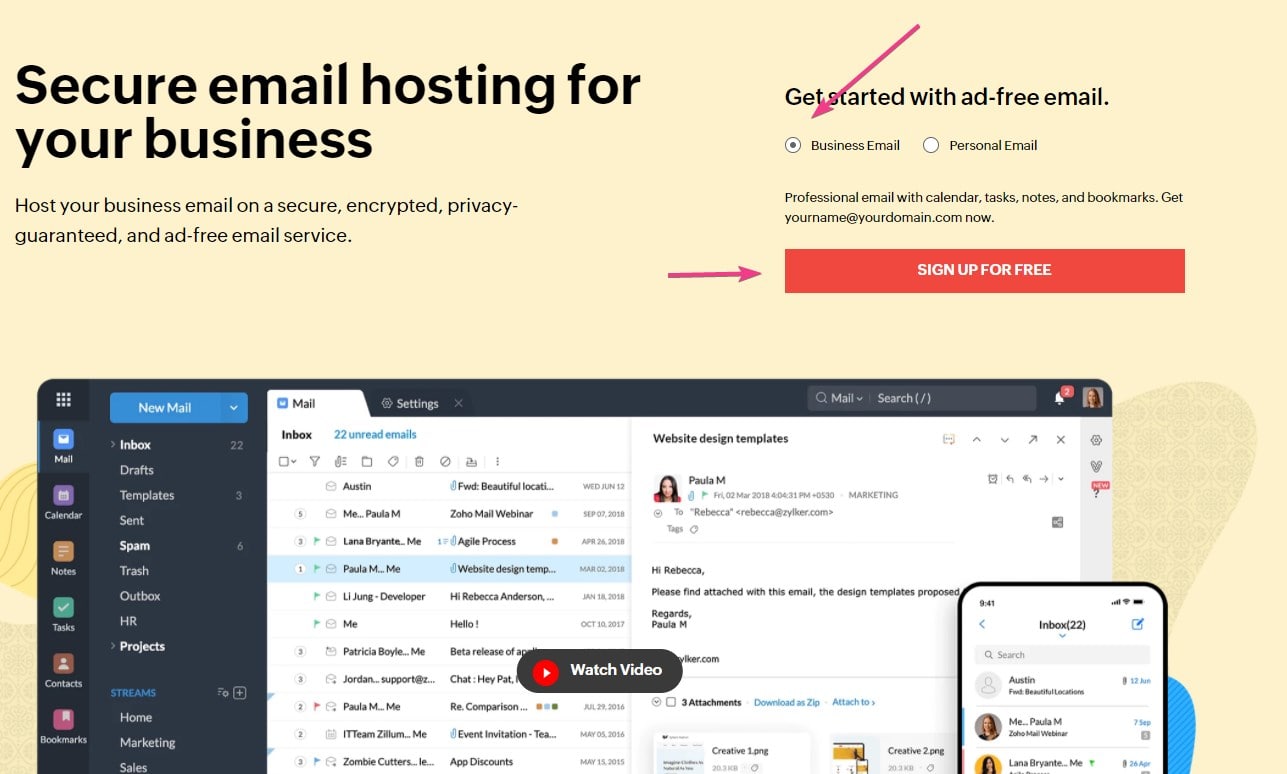
Open the Zoho Mail Page. Here you will see two options for Signing up the service, one is Business Email and the other one will be Personal Mail. Select the first one and click on the Sign up for free button.
Scroll Down to select the Free Plan available for the service.
Step 2: Enter Domain and other details
You will see a space to enter the Domain that you want to use for the Business email and then click on the Add button. After that furnish other details to complete the registration process.
Step 3: Verify Domain
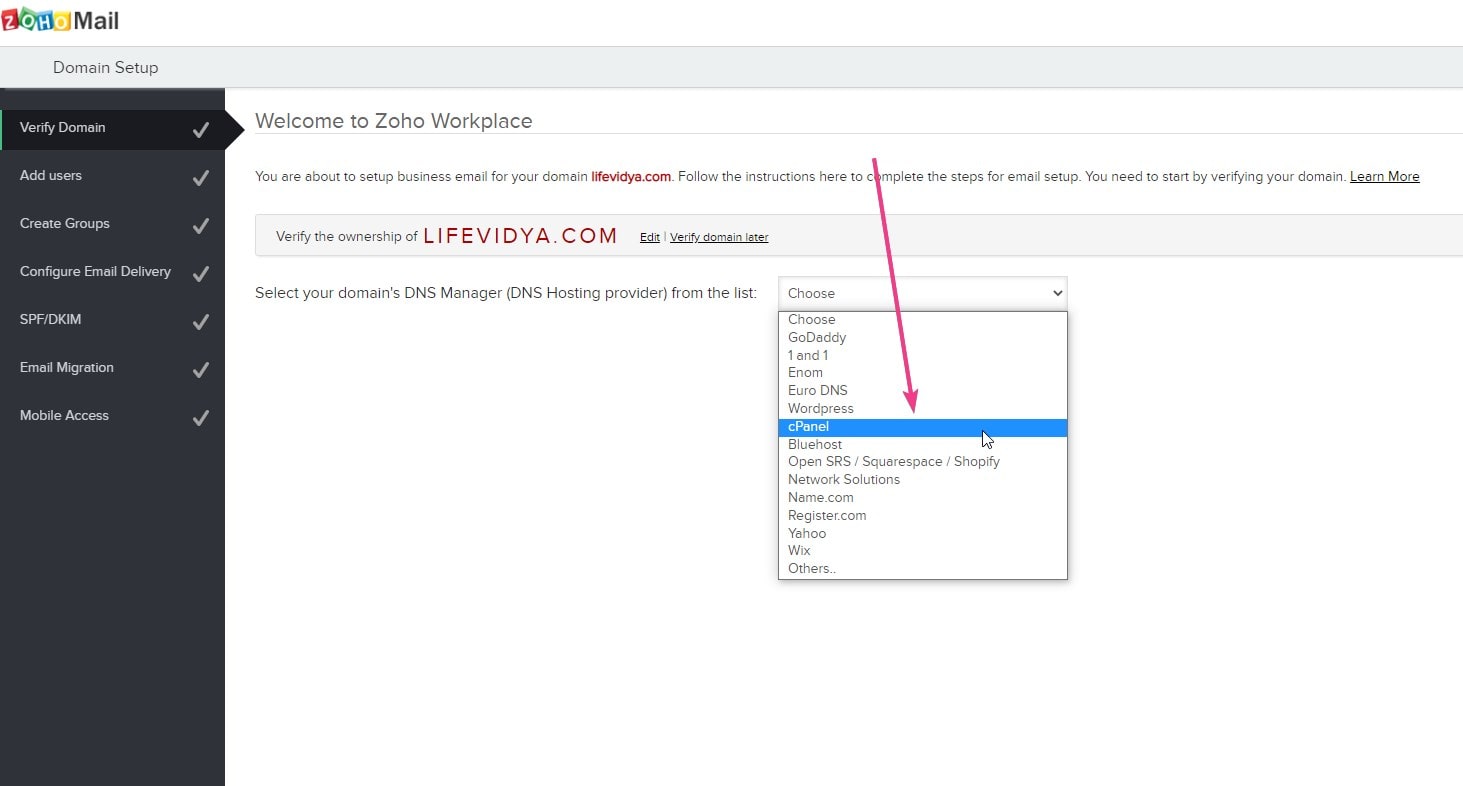
This is the step to confirm, you are the owner of the domain which you want to use for an email address, therefore the verification needs to be done. Thus, Zoho will give some options that we can use to verify that.
Click on the drop-down box and select your registrar and if it is not in the list then simply select the Other option. I am assuming here you don’t have hosting or even if you have then still you can use the below given method. Simply from the Drop-Down box select the ‘Other‘ option.
Now, you will see the corresponding procedure for the verification that is adding a TXT file entry in the DNS.
- You can create a TXT record for verification in your DNS Manager following the general instructions given below.
- Log in to your account with your domain registrar. (Your Domain’s Administrative DNS Host).
- Open your Domain Management Page to update the DNS Records (DNS Manager or DNS Control Pane or Advanced DNS editor).
- Locate the option to add TXT records (Generally found under DNS Records, you can also consult the help page of your registrar in case you are not clear).
- In the Name / Host / Alias / TXT, please leave it blank or add “@“
- In the Value / Points To / Destination field add the value given on your screen. For example-
zoho-verification=zb14609403.zmverify.zoho.com - If the TTL is editable, reduce the TTL to 300 seconds or the minimum possible value recommended by your Registrar.
- Click Save or Add Record option to save the TXT Records.
Once done click on the “Verify By Txt“.
Step 6: Add users
Once Verified that may take a few minutes to hours depending upon the DNS update process However, usually it doesn’t take more than a few minutes. After that add users and other steps. All the steps are guided one and very easy to follow, thus, no need to be worried. Well, in case you need more info, here is the official documentation from Zoho to create users and setting up of business email account.


Related Posts
How to Archive a WhatsApp Conversation Without Deleting
How to Clear or Delete Archived Emails in Gmail
10 Reasons, Why Should users Archive essential Emails on their devices or other media?
How to Clear Google Search History?
2 best Android Apps to open zip or archive files on the smartphone
How to use the XLOOKUP function in Microsoft Excel with Example