Follow the commands given in this tutorial to install Adminer Database manager on Windows 10 or 11 using WSL- Windows Subsystem for Linux.
Like PHPMyAdmin, Adminer is also an open-source web-based tool to manage databases. Earlier it was known as phpMinAdmin, however, later its developers changed its name to Adminer. Maybe to remove the confusion that appears with its name’s similarity with PHPMyAdmin.
Adminer is better than phpMyAdmin in terms of performance and is also a lightweight alternative. Further, it natively supports a wide range of database systems. Such as MariaDB/MySQL, PostgreSQL, MongoDB, and SQLite. Elasticsearch and more…
Steps to install Adminer on Windows 11 or 10
The steps can be followed on both Windows 11 and 10 OS to install Adminer for managing different Database systems.
1. Enable WSL on Windows
If you already have WSL enabled then move to the next step otherwise go to your Windows Start menu and type “turn windows features on or off“, and open it as its icon appears.
Scroll down to Windows Subsystem for Linux, select it, and hit the OK button. Once the installation of WSL is completed, a dialogue box will ask you to restart the system.
2. Install Ubuntu Distro
Next, right-click on your Windows Start button and either select Powershell (Admin) or Windows Terminal (Admin) whatever is available in your case. After that type the given command to install the latest version of the Ubuntu distro on your Windows 10 or 11.
wsl --install -d UbuntuSoon, the Ubuntu WSL distro will be installed on your Windows system.
3. Install Adminer on Windows 10 or 11
We already have a Linux distro on our system, now we can follow the further command as we do in Linux. For that open the Ubuntu distro you have just installed for WSL. To do that you can click on the Windows start menu and type – Ubuntu. As its icon appears, click to run it.
Run system update:
We have just installed Ubuntu, then to update its APT index cache run the system update command once.
sudo apt updateAdminer Installation
We don’t need to add any third-party repository to install Adminer on Ubuntu. Because its packages are already available through the default repository of Ubuntu to set using the APT package manager.
sudo apt install adminer -yThe above command will also install the Apache web server and PHP with the required extensions to run the Adminer on Windows WSL.
4. Start Apache and enable Adminer Config
Once the installation of Adminer is completed we need to start the Apache web server service and also need to enable the vHost configuration file available for Adminer. This allows us to access it in a web browser.
sudo service apache2 startsudo a2enconf adminersudo service apache2 reload5. Access the Login Interface
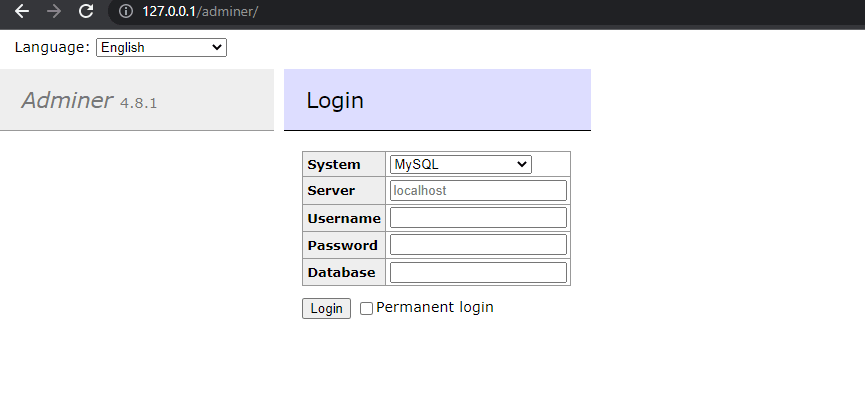
Open the web browser on your Windows 10 or 11 and in its URL box type – 127.0.0.1/adminer, soon you will see the login interface to your Database.
- Select the Type of Database from the drop-down box
- Enter the Server Address where the Database is installed
- After that type username and password


Uninstallation (optional)
In case after some time you want to remove the Adminer from Windows WSL then run the following command:
sudo apt autoremove --purge adminerOther Articles:
How to run Linux distro app as WSL 2 running on WSL 1
Install Ubuntu 20.04 WSL on Windows 11
How to install Docker on Windows 10 using PowerShell with WSL 2
Steps to install Adminer on Ubuntu 22.04 Linux
Related Posts
How to Archive a WhatsApp Conversation Without Deleting
How to Clear or Delete Archived Emails in Gmail
How to Clear Google Search History?
6 Best Free and Open-source Alternatives to WinZip & WinRAR
10 Top Best Free & Open Source Social Network Platforms to Start Your Own
2 best Android Apps to open zip or archive files on the smartphone