Learn the steps to install Microsoft Windows 11 bootable ISO on Hyper-V Virtual machine running on Windows 10 to experience the OS…
Windows 11 is the latest operating system by Microsoft to succeed Windows 10. Currently, it is available to Win 10 insider users as a system update. However, still, there is a way to download Windows 11 ISO to install on a Virtual machine to experience it without sacrificing your current OS.
Hyper-V is a virtualization platform that allows installing almost all types of operating systems virtually. It is available as a standalone system to install on bare metal machines or use as an optional feature in Windows professional editions. Let’s see how to install Win 11 on Hyper-V.
Install Windows 11 ISO on Win 10 Hyper-V Virtual machine
The steps given here will work on all Windows versions running Hyper-V to install Win 11. Here we are using Win 10.
1. Enable Hyper-V on Windows 10
The first thing is you must have enabled the Hyper-v feature on your Windows 10 to start using this Microsoft hypervisor program.
1. For that right-click on the Windows 10 start button and select Windows Powershell (Admin).
2. Copy-paste the below-given command and hit the Enter key.
Enable-WindowsOptionalFeature -Online -FeatureName Microsoft-Hyper-V -All
3. Restart the system after that.
2. Create a New Virtual Machine for Windows 11
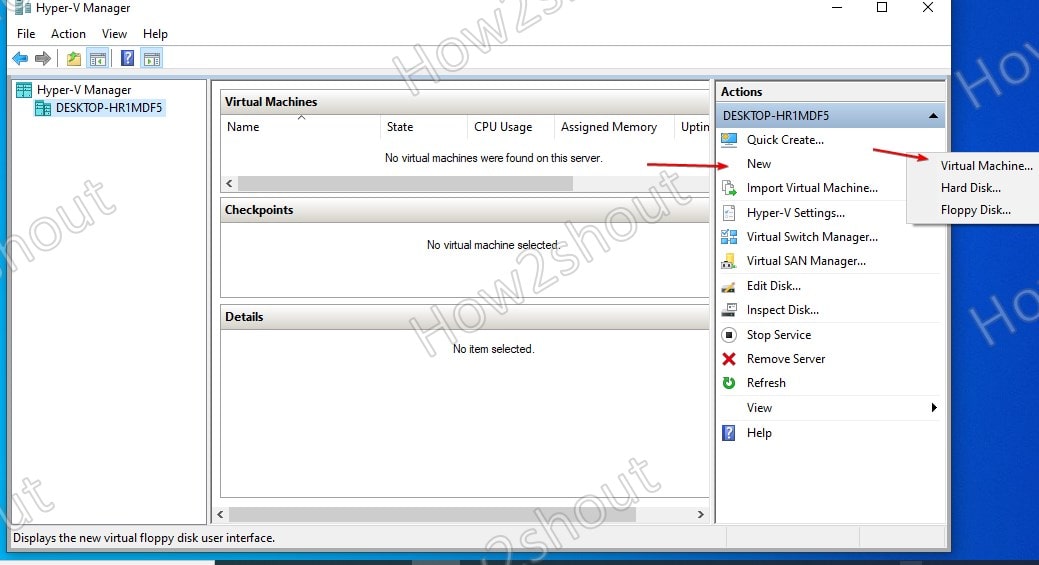
Open Hyper-V and click on the New option given on the right side and then “Virtual Machine”.
3. Specify Name and location
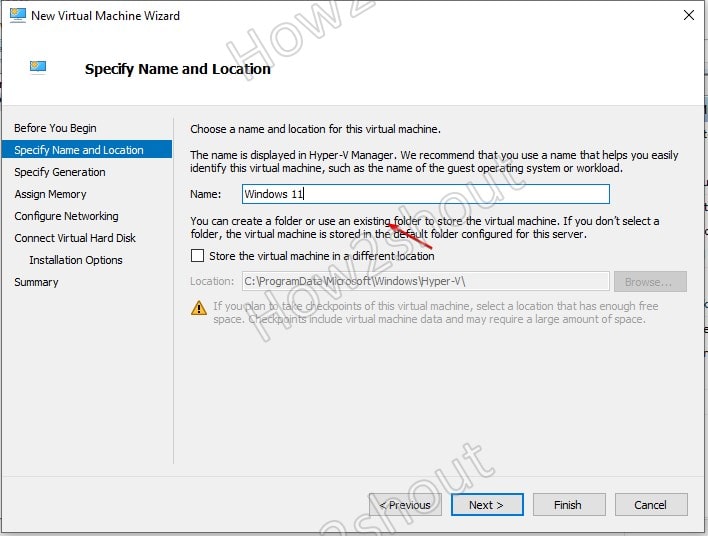
Set some name for the VM you are about to create such as “Windows 11“. This will also use to identify the machine in Hyper-V Manager. And then click on the “Next” button.
After that select Generation 2 for the VM.
Next, add the amount of RAM/Memory you want to provide to your Windows 11, this should be at least 4GB or more for optimum usage.
4. Configure Network
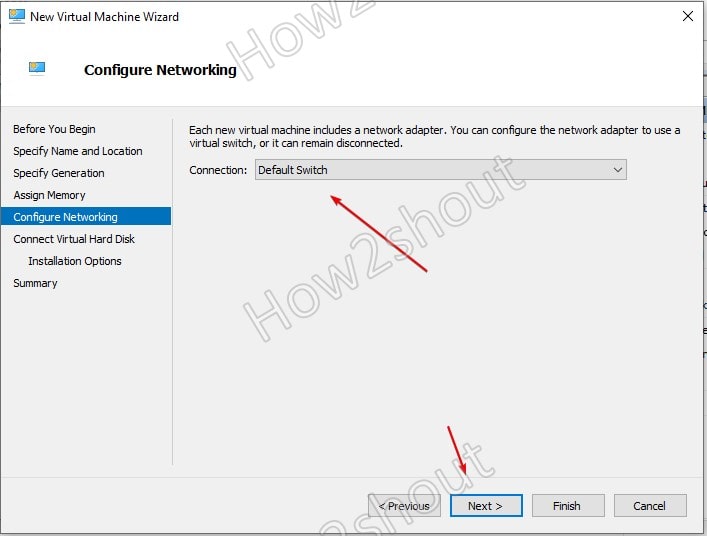
Click on the Connection Drop-down box and select “Default Switch” to provide network connectivity to VM.
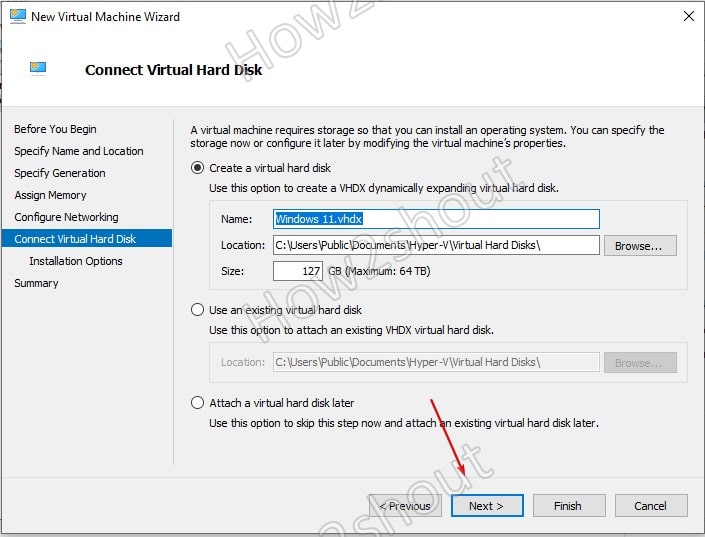
5. Create a Virtual hard disk for Windows 11 installation
Everything will be set already, however, still you can change (increase to decrease) the size of the Hard disk you want to assign Windows 11.
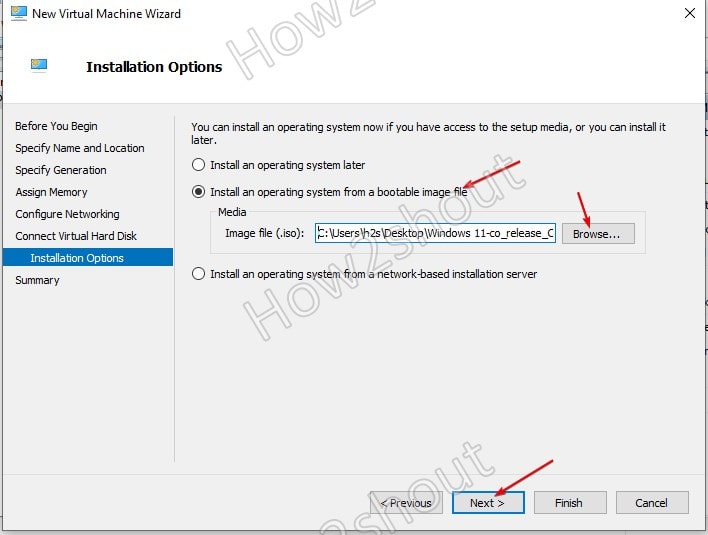
6. Add Windows 11 bootable ISO image
Microsoft officially yet doesn’t provide Windows 11 ISO image while writing this article but that doesn’t mean we cannot get it. Here is the tutorial to download the latest Windows 11 ISO UUP Dump or from the official Microsoft website. (recommended)
Once you have the ISO image, select “Install an operating system from a bootable image file“.
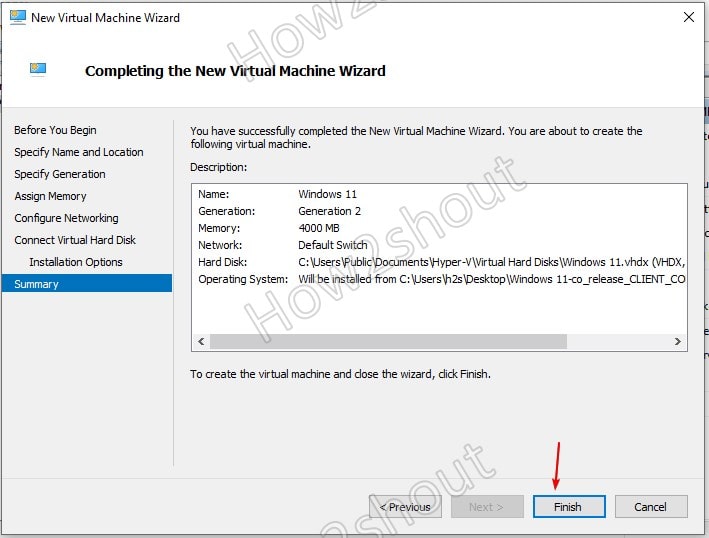
Finally, click on the “Finish” button.
7. Start Windows 11 Hyper-V Virtual machine
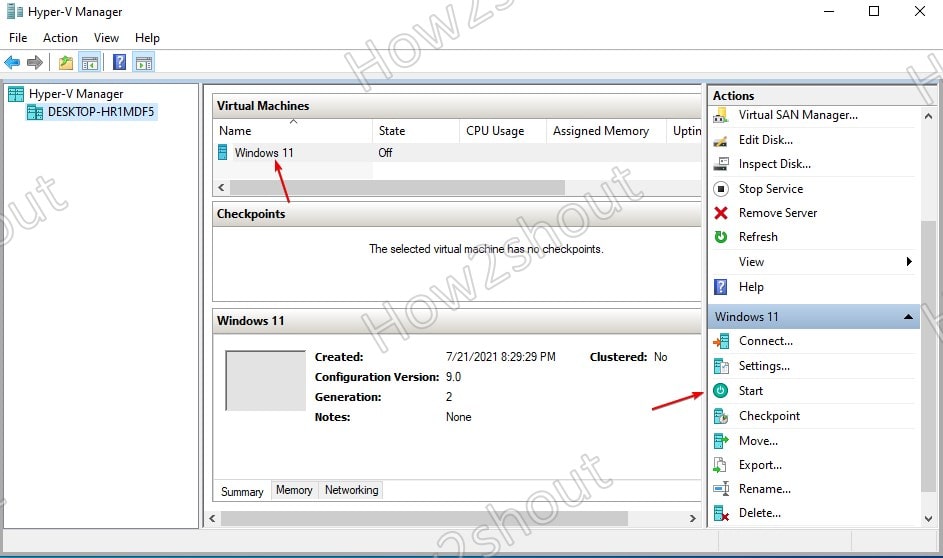
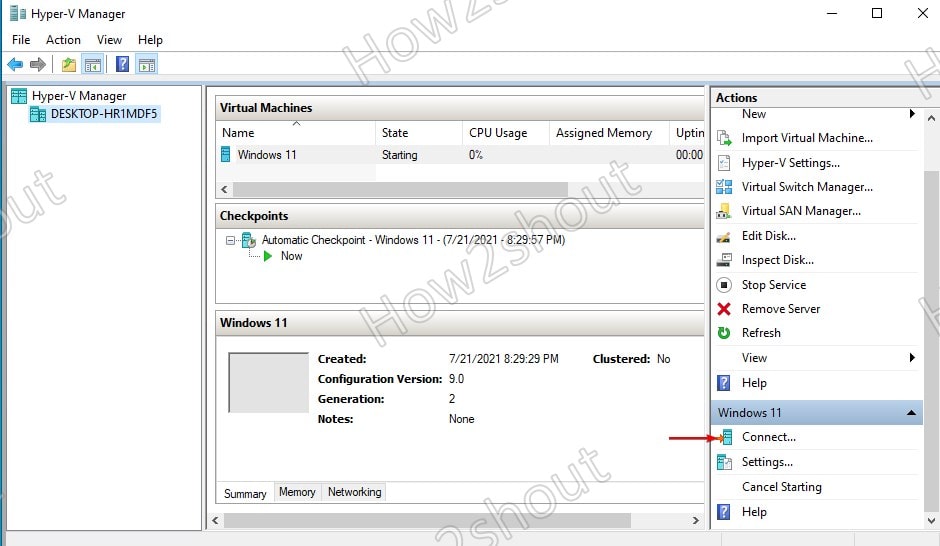
The created VM will appear on the Hyper-V Manager, either double click on it or select the same and click on the Start option.
Once the VM is started to access it, select the VM and click on the “Connect” option from the right side menu.
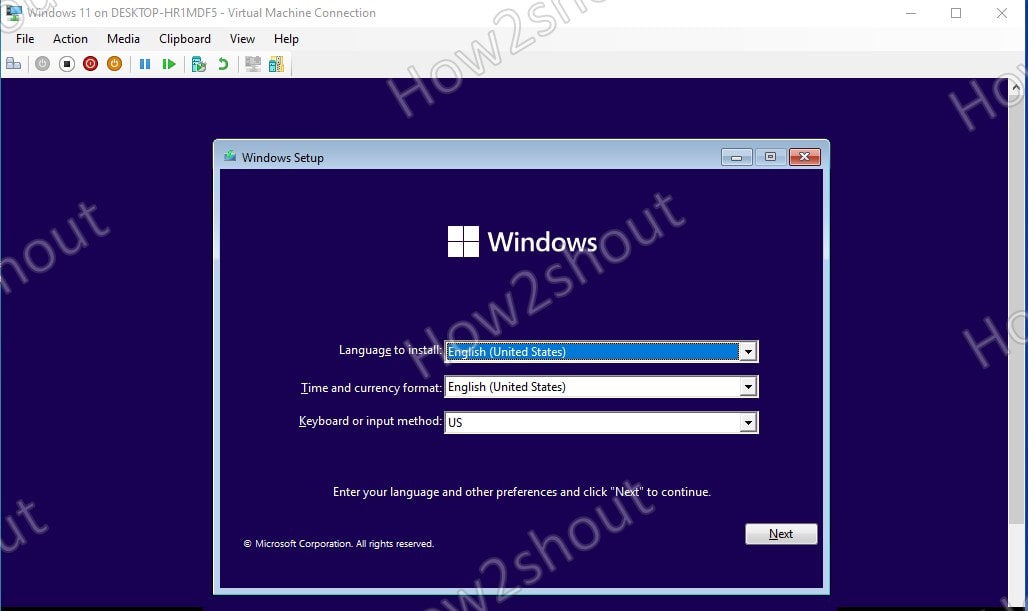
8. Instal Windows 11 VM
From here you will get the regular Windows installation wizard. Just follow it to install the OS.
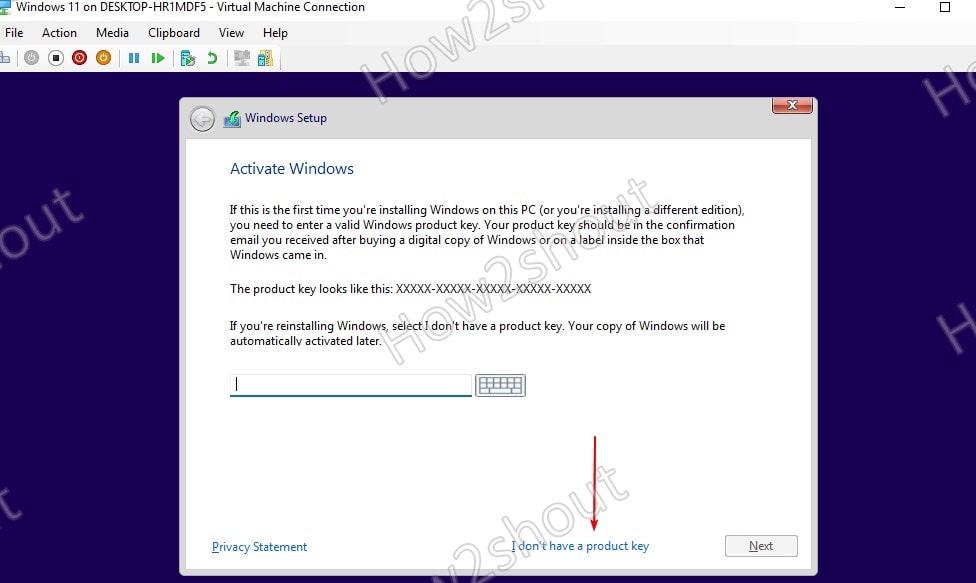
When it asks for a Serial key, select “I don’t have a product key“.
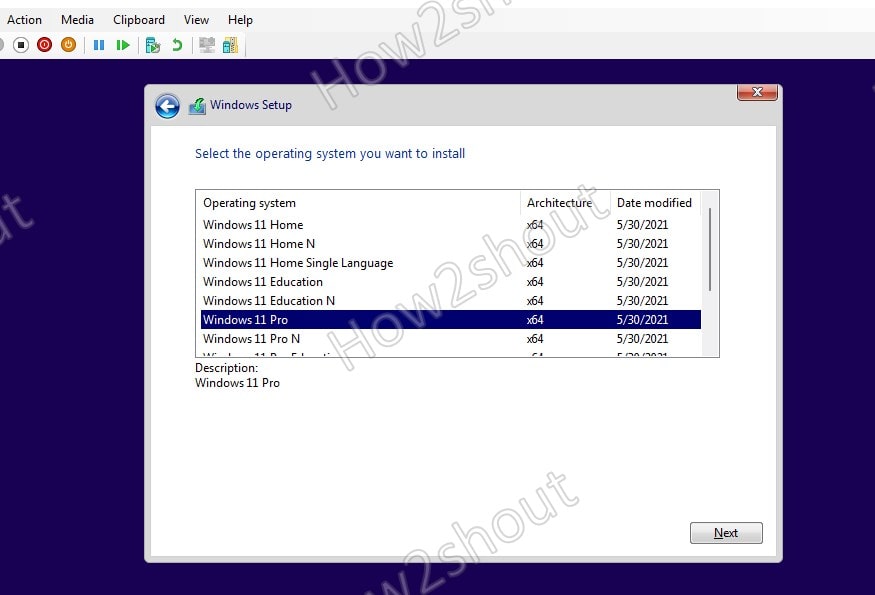
Choose the edition of the Windows 11 operating system you want to install.
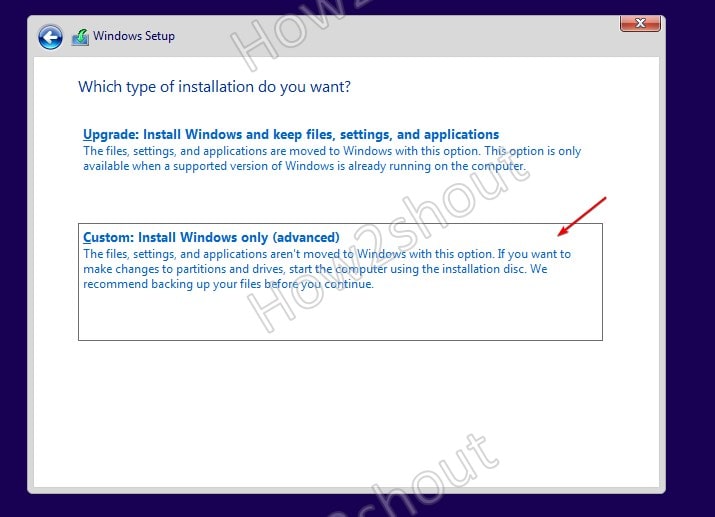
Select the “Custom: Install Windows only (advanced)“.
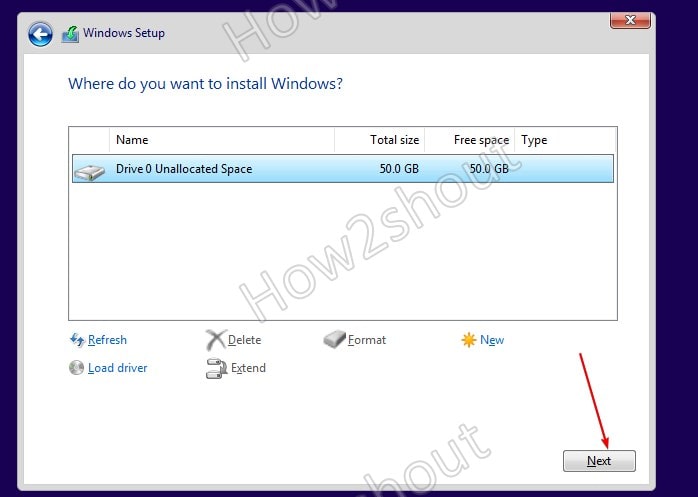
Let the default Virtual hard disk be selected and simply click on the “Next” button.
9. Start using Windows 11 on Hyper-V
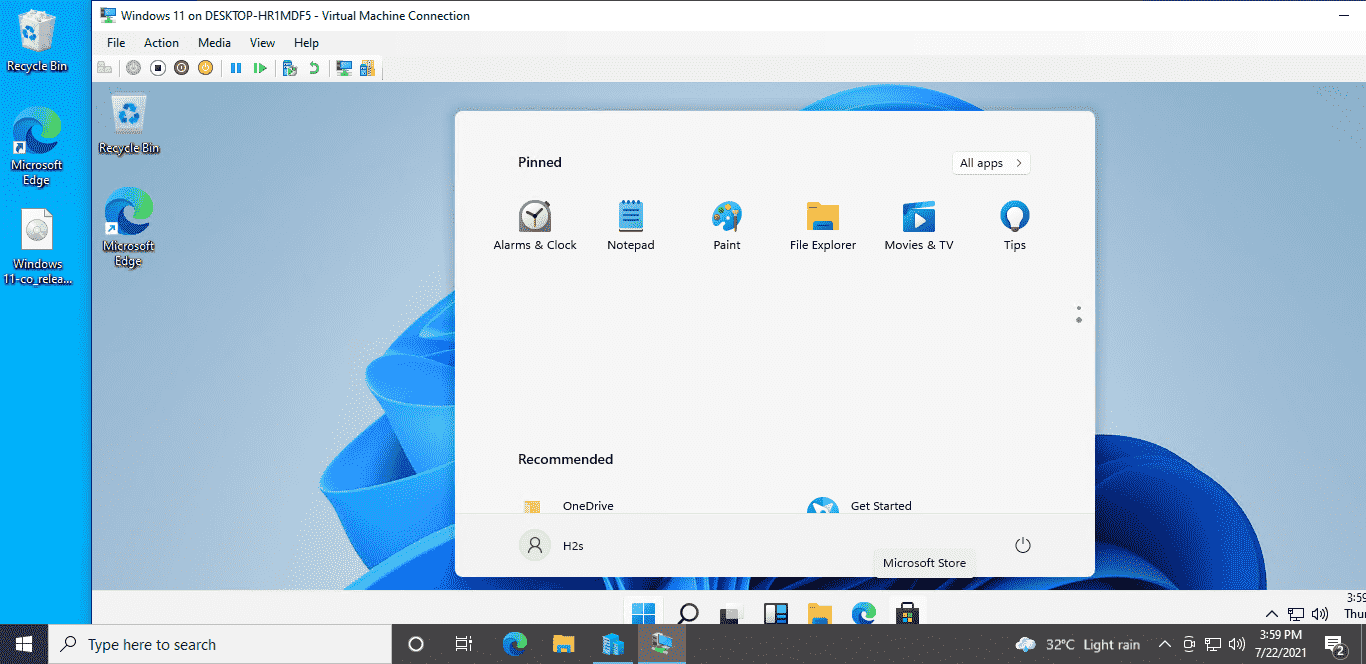
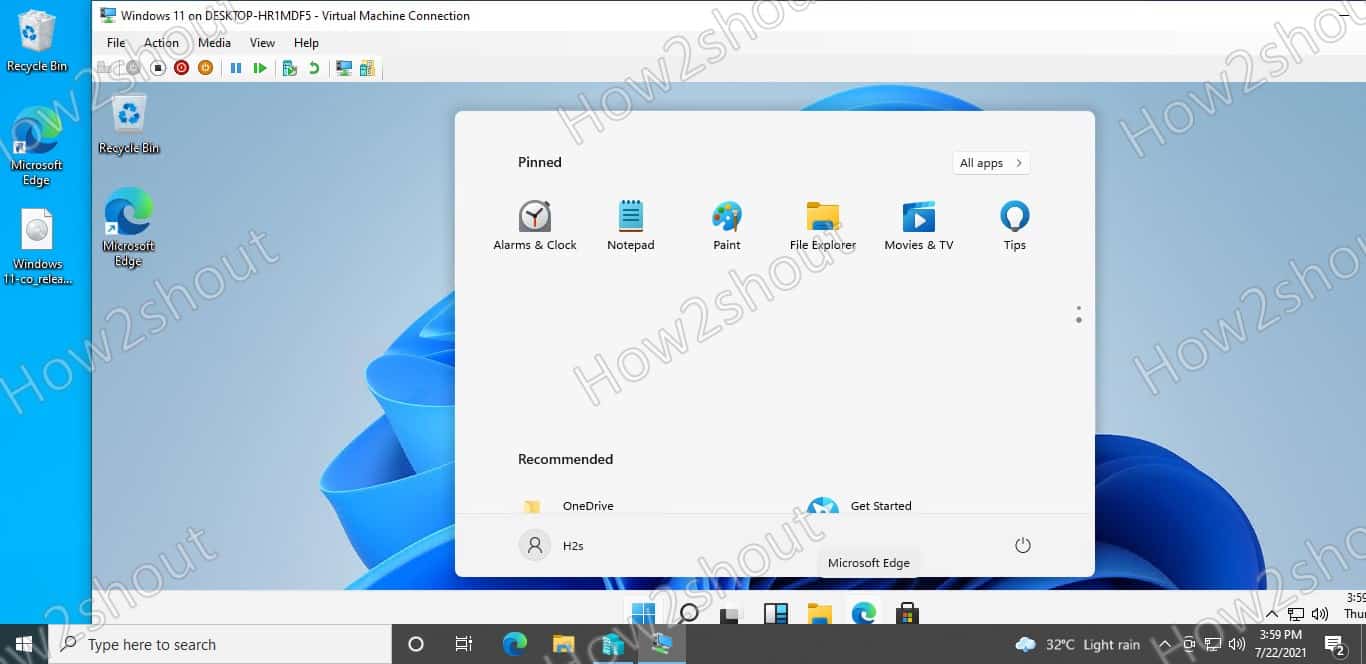
Once the installation is completed, you will have the running Windows 11 operating system on your Windows 10 Hyper-v.
Other Articles:
♦ How To Install Hyper-V on Windows 10
♦ Hyper-V vs VirtualBox: A basic comparison
♦ Download and install Hyper-V on Windows 10 Home
♦ How to use hyper-v to install Linux Virtual machine
Related Posts
How to use the XLOOKUP function in Microsoft Excel with Example
Check the RAM type on Windows 11 or 10. See what DDR RAM you have on your PC in different ways
How to Check Firmware in CMD on Windows 11 or 10
How to Change WIFI or Ethernet MAC address on Windows 11 or 10?
How to Install 7-Zip on Windows 11 or 10 with Single Command
Install Google Earth on Windows 11 or 10 Using a Single Command