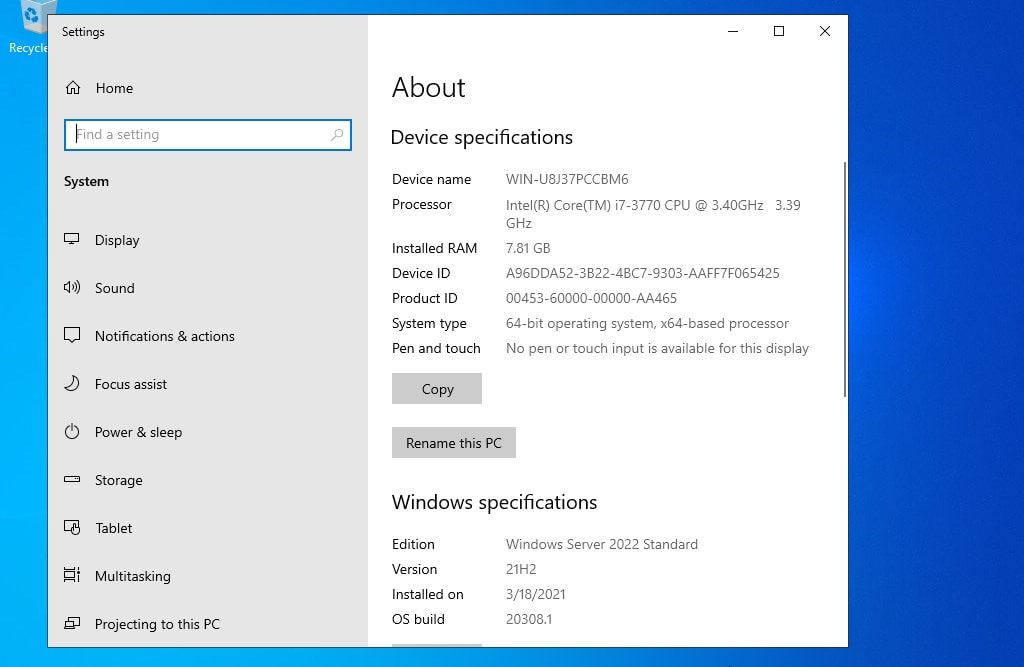
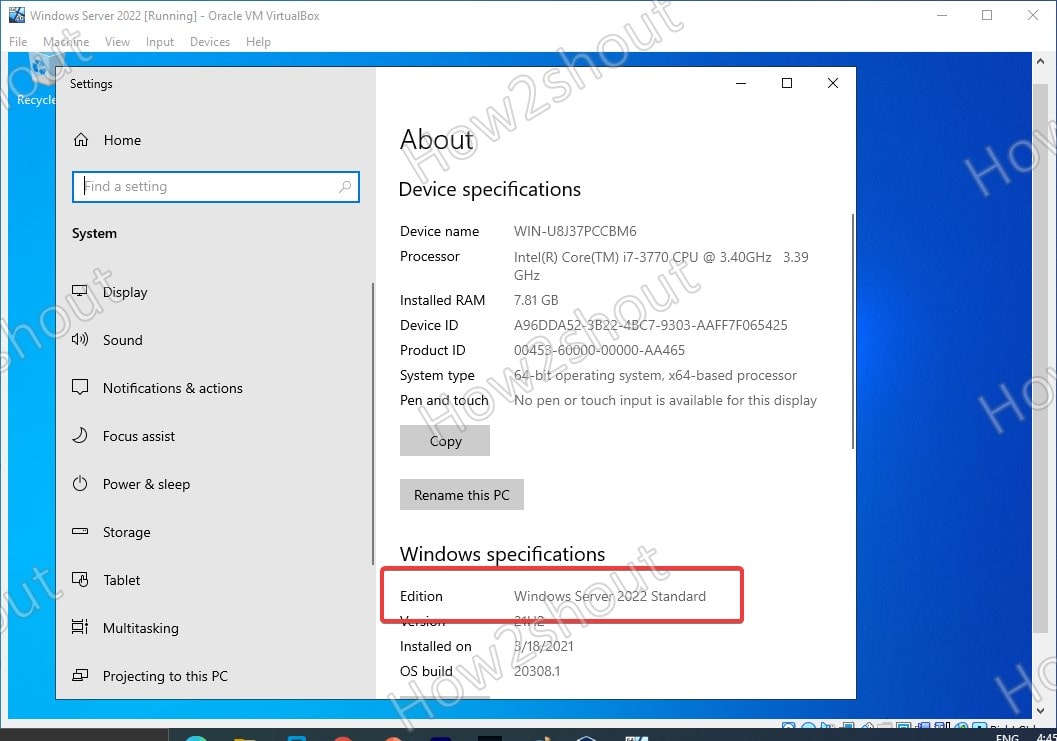
Here we are going to install Windows Server 2022 LTSC preview version on VirtualBox virtual machine to try its latest features…
As per the virtual Ignite 2021 conference announcement done by Microsoft, they are planning to release the final version of Windows server 2022, later this year. Whereas the Trial versions of Windows Server 2022 preview are already available for Windows Insiders.
The upcoming Windows Server’s Long Term Servicing Channel Release (LTSC) will receive security updates for ten years. The current version is Windows Server 2019 LTSC. The innovations of Windows Server 2022 include multi-layer protection against threats, which can be activated via Secured Core Server. Besides, the new version enables HTTPS via TLS 1.3 ex works to support secure connections for business-critical data.
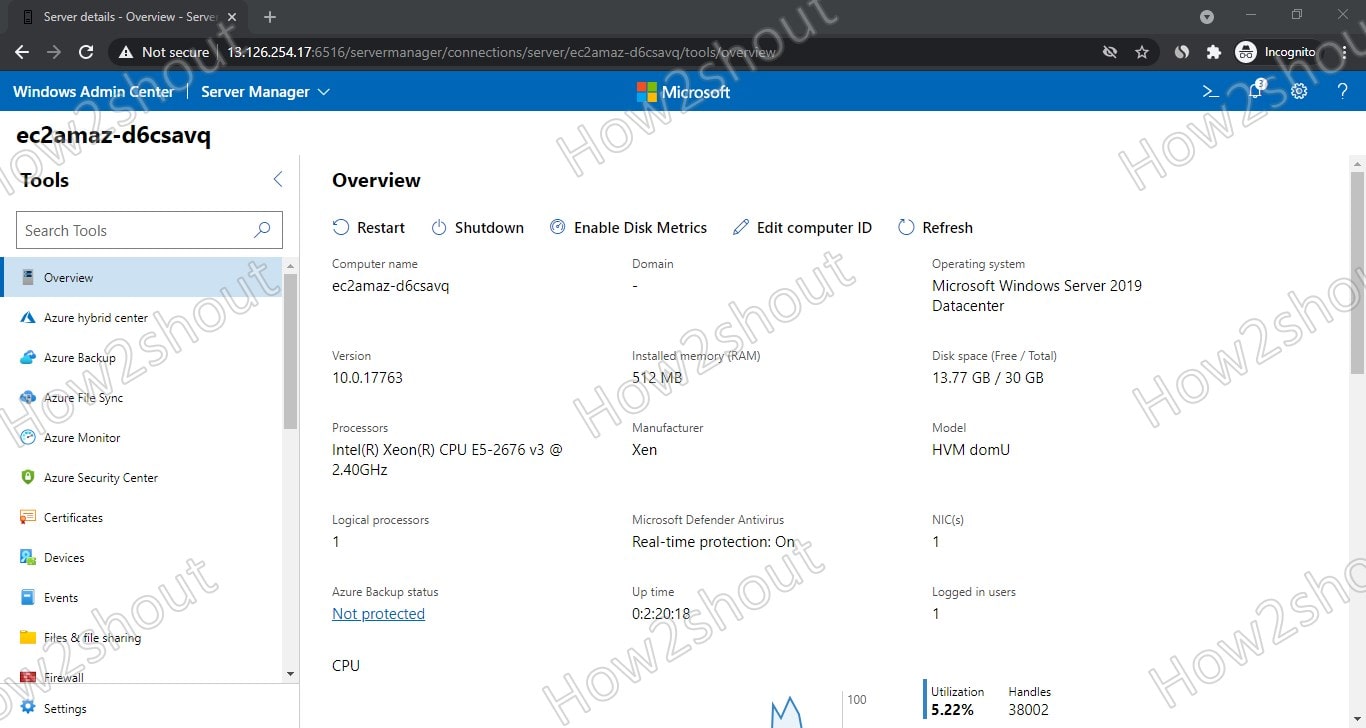
Furthermore, the updated version of Windows Admin Center and the possibility to manage Windows Server in your own data center with Azure Arc. As per the official blog, now it becomes easier to manage virtual machines. Besides, the Storage Migration Service receives a new scenario for migrating file servers from its own data center to Azure. For more information, the user can refer to the official announcement.
Windows Server 2022 installation on VirtualBox Virtual machine
1. Download Windows Server 2022 ISO
To get the preview ISO file of the Server 2022, the user can visit the official Windows Insider page of Microsoft. Or else see our step by step article on this – How to get Server 2022 ISO or VHDX image
2. Install VirtualBox
Although if you are here for this tutorial then you would already have VirtualBox installed on your system, if not, then download it from virtualbox.org. It is available for all popular platforms. Where for Linux see our tutorials such as Redhat and Ubuntu
3. Create a Virtual machine for Windows Server 2022
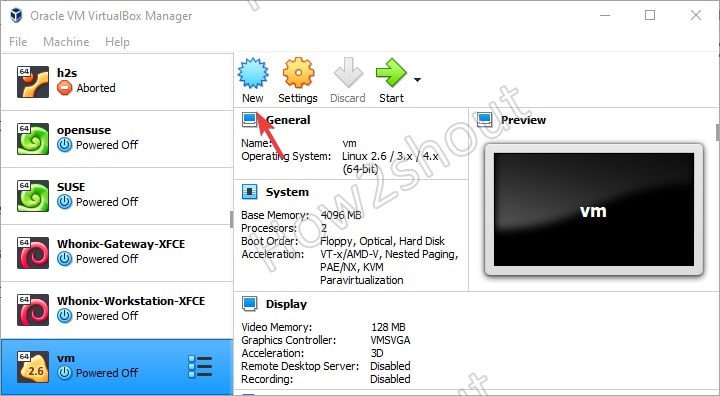
Run the installed VirtualBox and follow the below steps to create Microsoft Server 2022 virtual machine.
- Click on the New button.
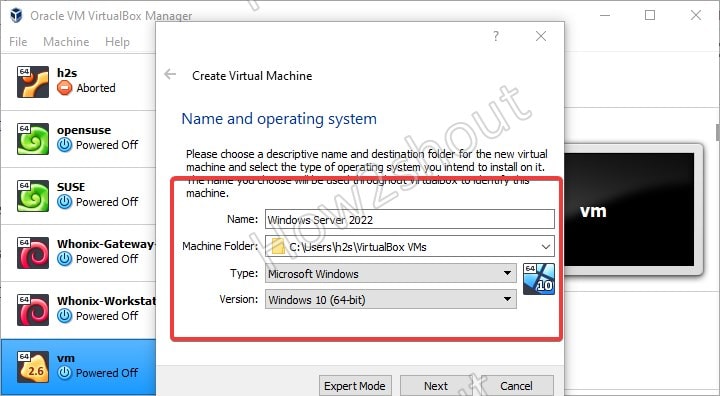
- Give some name to your VM, here we are installing the server version, thus, we name it the same i.e Windows Server 2022.
- Select Microsoft Windows as OS type and Windows 10 64-bit as version.
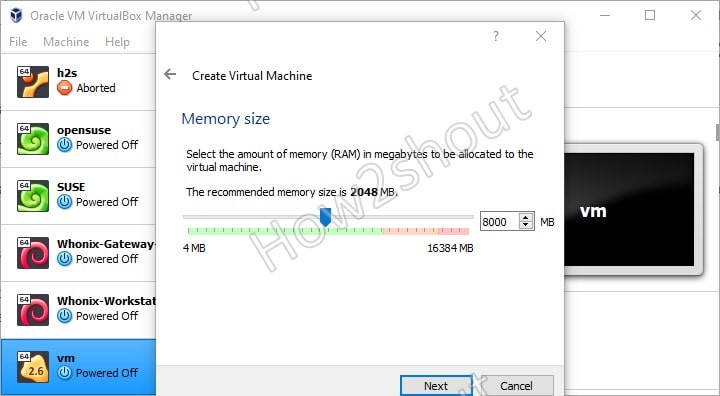
- If you want to use the Desktop GUI version then at least 2GB RAM should be assigned, however, we recommend 4GB or more depending upon what are you planning to install for better performance.
- Create a Virtual Hard disk. When it asks for file type go for VHD so that later you can use the same virtual disk image in Hyper-V as well.
- Select Dynamic Allocated, this will not allocate all the assigned VHD space at once, instead steadily as our virtual disk starts growing.
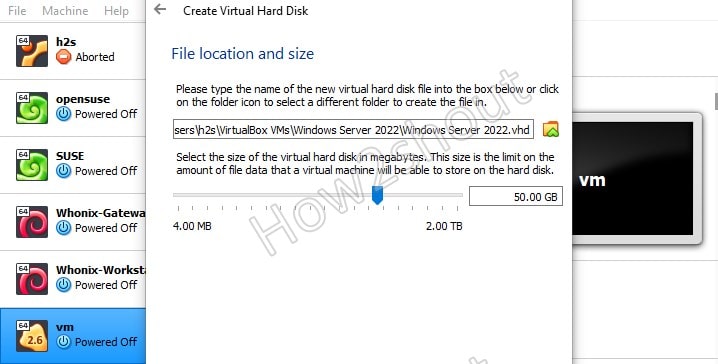
- In the next steps, use the slider bar and allocate the amount of space for the VHD file. Here we are stipulating 50 GB but you can more if you are planning to deploy some enterprise features/applications.
- Finally, finish and you will have your Server 2022 Virtual machine on VirtualBox.
4. Start Virtual Machine
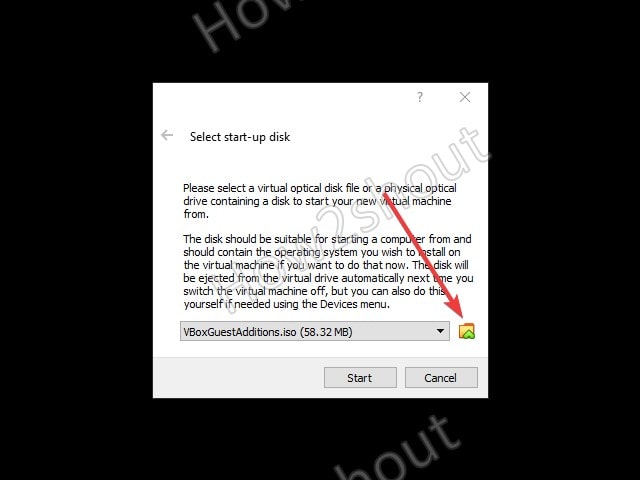
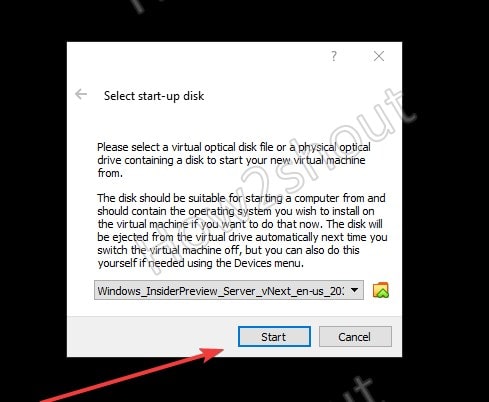
Now, select the created VM from the left panel of VirtualBox and click on the Start button given in the Menu… after that the Vbox will ask you to select the startup disk. Here we have to choose the ISO file we have downloaded for Windows Server 2022 at the first step of this article.
⇒ Select the folder icon to open the File Explorer window of your respective OS.
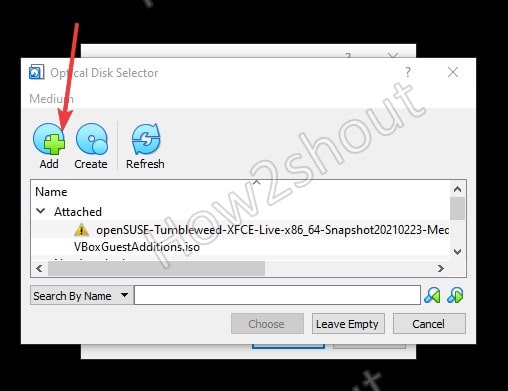
⇒ Click on the Add button to select the downloaded Microsoft Server 2022 ISO image as bootable or Startup disk medium.
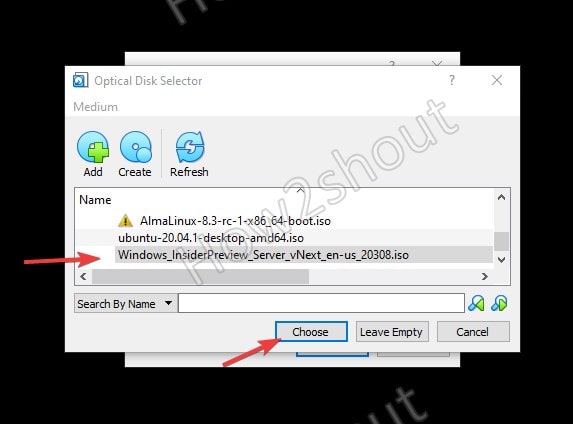
⇒ When the ISO image appears in the disk display area select it and then click on the Choose button.
⇒ Finally, hit the Start button to move forward for the installation of Microsoft Server 2022 on Virtualbox VM.
5. Install Microsoft Server 2022
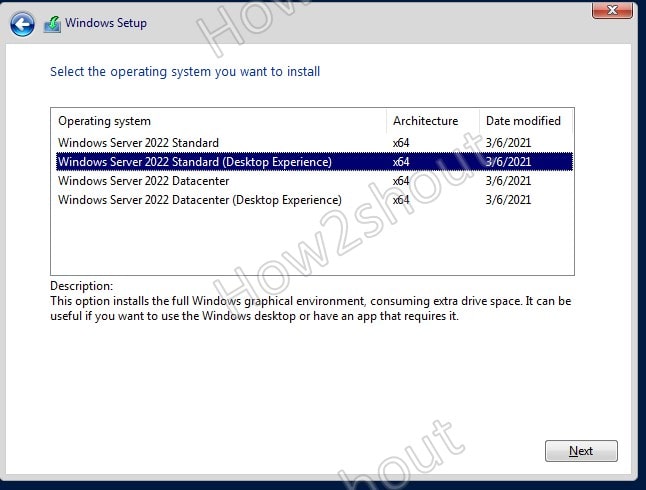
Select “I don’t have license key” when the installation setup asks for it. Moving forward, you will see multiple setups to install, that are:
- Windows Server 2022 Standard
- Windows Server 2022 Standard (Desktop Experience)
- Windows Serbger 2022 Datacenter
- Windows Server 2022 Datacenter (Desktop Experience)
If you have some application that requires Graphical User Interface or you want to experience the Server with GUI, then select the Desktop Experience one. Whereas those who want to manage their server (without GUI) installation using Windows Admin Center can go for the Standard or DataCenter option.
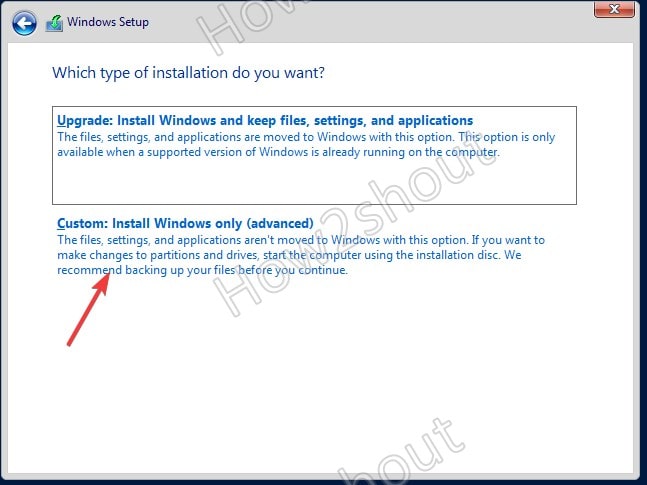
As here we are not upgrading any previous Windows server installation, thus select the Custom Install.
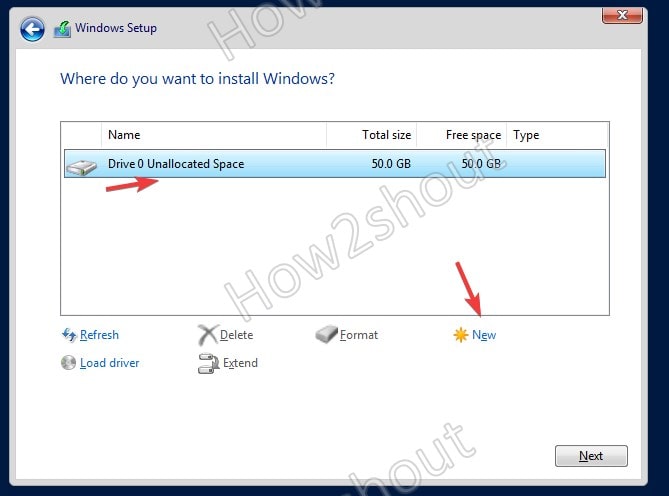
Select the available hard drive, we have created on VirtualBox. If you want to create partitions then select the NEW option otherwise click on the NEXT to let the Server use the whole drive to install the OS.
6. Set Admin Password
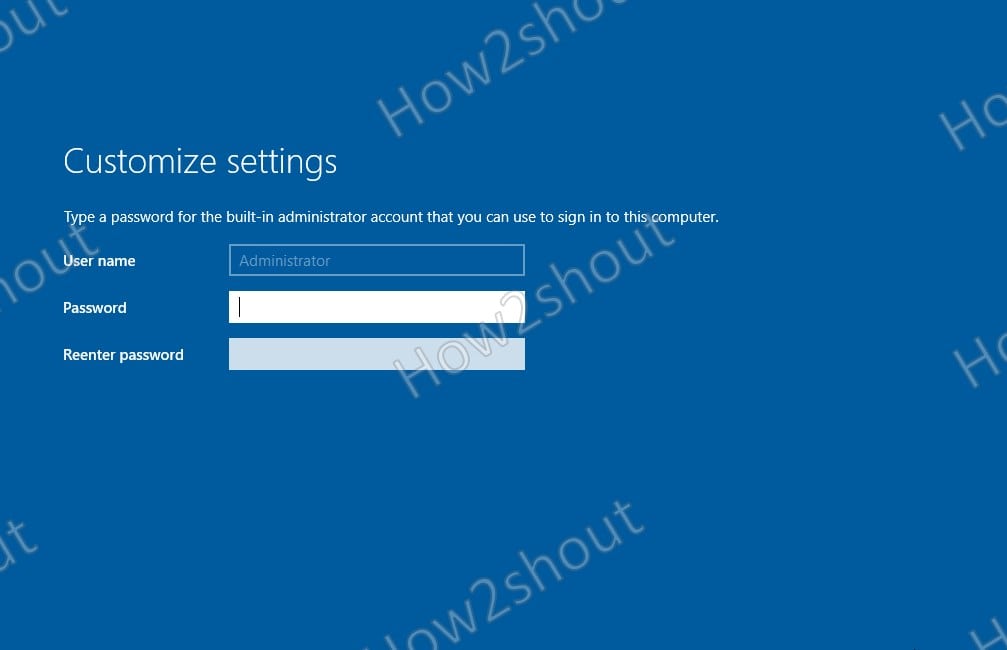
Once the installation is complete, the setup will ask you to type a password to secure a built-in Administrator account.
Later press – Ctrl+Alt+Del to login.



Thanks for your instroduction, I just successfully install server 2022 on the virtual box, and I got a product key from getsoftwarekey.com, it is now activated