Most users these days have multiple audio output devices connected to the computer and depending upon the programs that you use, some programs might even add multiple audio input and output devices, which you will hardly need, or you can use for playing or recording audio. So, even it is easy on Windows 10 to switch to another audio device, the presence of so many audio devices messes the list up. You can rename the audio devices easily, and you can find how to do that here, but, if you are looking for more convenience, you can use a third-party utility that will only show those audio devices that are you can use for playback.
With the app that I will be talking about, you can easily switch between the useful audio output devices, either from the menu or by using a simple and easy-to-remember shortcut key. This will make your life a lot easier, especially if you face troubles with multiple audio output devices on your Windows computer. The program that I will be talking about is completely free to use, and there are no ads or additional crap that might hinder you from using any third-party program on your computer. If you connect audio devices from time to time, this program can be useful to you in that case, as well.
Use SoundSwitch to switch between audio playback devices on Windows 10/7
So, without any further delay, let’s get started with how you can use a third-party open-source SoundSwitch tool to switch between the audio output devices on a Windows computer.
Step 1: Open the following link to download open source SoundSwitch on your Windows computer.

After you have downloaded SoundSwitch, install the program on your computer exactly the way you install other Windows programs. You will not find any problem installing it. The program doesn’t even come with unwanted programs packed inside the installer.
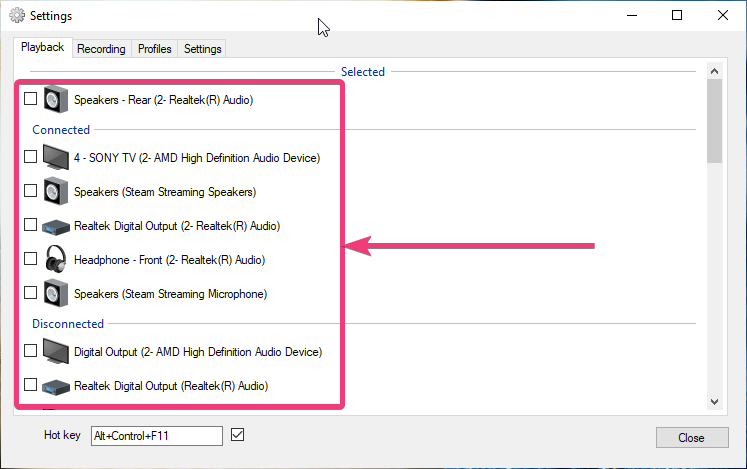
Step 2: You have installed the program on your computer, a window will open, where you will have to select the audio devices that you want to select for playback, and once you have completed selecting the audio devices, just exit the window. In this window, you can also change the hotkey to cycle through the playback devices.
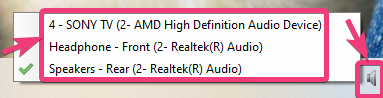
Step 3: Now, you can easily choose the output device for playback by clicking on the open source SoundSwitch icon in the system tray, followed by choosing the actual playback device.
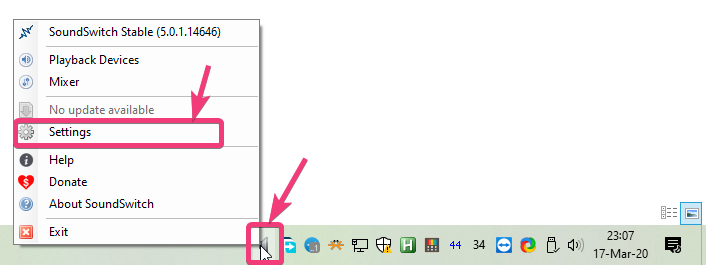
Step 4: If you want to add more devices to the list of selected playback devices, just right-click on the SoundSwitch icon in the system tray, and click on ‘Settings’.
Step 5: Now you can again add more devices to the list so that you can easily select the playback device from the list created by you.
If you cycle through the playback devices, you can also get a notification on the top left part of the screen.

SoundSwitch is really a nifty tool that can make it very easy to switch between audio devices when you need to do that. By right-clicking on SoundSwitch, you can additionally open the Windows Volume Mixer, see the list of playback devices, and much more. So, even if it doesn’t double up as a sound control panel, you can open the most useful sound settings right from within SoundSwitch.
So, that was all about how you can get started with SoundSwitch and make the experience of switching between playback devices, a piece of cake. Do you have any questions or faced any problems? Feel free to comment on the same below.
Related Posts
How to Archive a WhatsApp Conversation Without Deleting
How to Clear or Delete Archived Emails in Gmail
How to Clear Google Search History?
2 best Android Apps to open zip or archive files on the smartphone
How to use the XLOOKUP function in Microsoft Excel with Example
How to set up an out-of-office responder on Gmail? Step-by-step guide on setting up a Vacation responder