Handbrake is a free and open source tool developed to convert almost all kind video formats to another via widely supported codecs. It is a cross-platform encoding tool (Windows, Mac and Linux).
You can hardly find anybody who isn’t fond of watching videos. Besides being the best source of entertainment, video tutorials can help us learn new skills, know some life hacks, recipes, and whatnot. Videos are available in several formats and resolutions, which eventually result in a difference in the quality of a video, however, we all love watching videos in Full HD or 1080p only because it pleases our visual sense organ. But Full HD or 1080p videos consume a lot of space, and sometimes it becomes difficult to share or store the same for several limitations.
Most mid-range smartphones today come with the capability to record videos in Full HD or 1080p, and some even can record videos in 4K resolution. But most Full HD videos balloon in size with every minute of recording, and you can easily cross 1 GB of your storage within a few minutes of recording Full HD or 4K videos. Well, you don’t need rocket science to understand why Full HD or 4K videos consume such monumental space on your storage. But if you need to send your recorded videos to your friends through WhatsApp or other services, or you just don’t need that great quality after recording, you can use Handbrake to reduce the size of a video with minimum effect on the quality.
So let’s get started with how you can use Handbrake to reduce the size of a video for saving storage space or sharing it with your friends. It is a cros-platform video encoder available for Linux, Windows 10/8/7 and MacOS.
Here we are installing Handbrake on Ubuntu 19.04, however, the steps will be the same for Ubuntu 18.04/16.04/14.04, Debian, Elementary OS and other similar Linux distros. For other streams Linux OS, you can use Flatpack.
How to use Handbrake to reduce the video file size
Download Handbrake and install in on your computer. Download it from the source in the link if you don’t want to keep a constant eye on the installer for any malware. You can even download the Handbrake portable version from the same download page. The portable version is only available for 64-bit Windows OS.
Installation on Linux
Step 1: Command to install Handbrake open source video encoder
On Linux, you can install Handbrake by downloading it from the official apt repository quite easily.
Just open a Terminal window, and type in the following command followed by hitting the enter key.
sudo apt install -y handbrake

Step 2: Run the encoder app
The installation process will take quite some time, and once it is complete, you can open the same from the apps section of your Linux distribution.
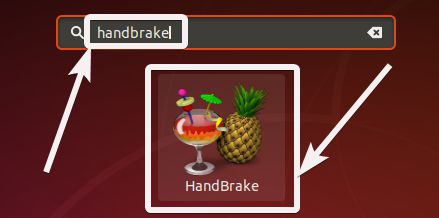
The user interface of Handbrake on Linux will be similar to that on Windows, as shown below.

Step 3: Select a video file
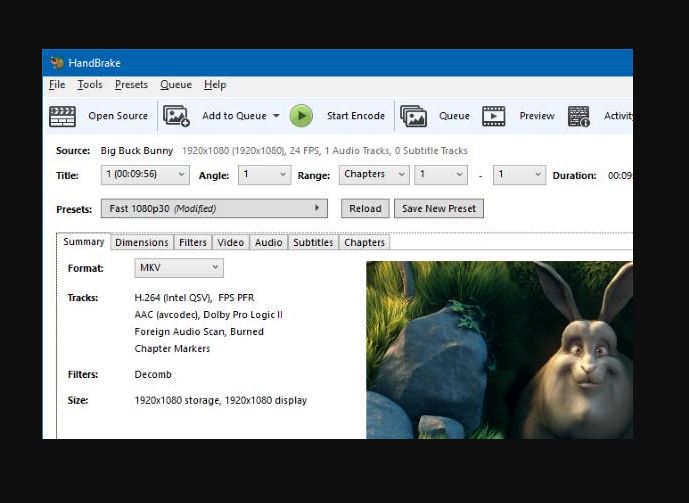
Once the installation is complete, open Handbrake. You will get the following user interface across all platforms, where you can drag and drop your video file, or you can even open the file browser to add a video file.

After the video is added, you can configure different settings associated with reducing the size of your video file, however, the default settings will be good enough to reduce the size significantly without affecting the quality of your video.
Step 4: Handbrake Encoding
You will also have to set an output folder, where the file with reduced size will be stored. Just click on ‘Browse’, corresponding to ‘Save As:‘ to choose an output folder. After you are done, click on ‘Encode’ to start the process of reducing the video file size. Unless you are in a hurry, I will recommend you to explore the additional options before you start encoding.

Step 5: Options to change Video formats
You can change the video format, apply some pre-configured presets depending upon where you will use the video, by clicking on the drop-down menu corresponding to ‘Presets’. You can even configure the optimize the video for the web and make it compatible with iPod 5G.
Depending upon your requirements, you can use web presets to optimize it for Gmail, YouTube, Vimeo, etc.
To optimize a video for different devices like iPod, Chromecast, Amazon Fire, Roku, Xbox, etc., you can look at the ‘Devices’ section and there are general presets, as well, for normal size reduction of the video.


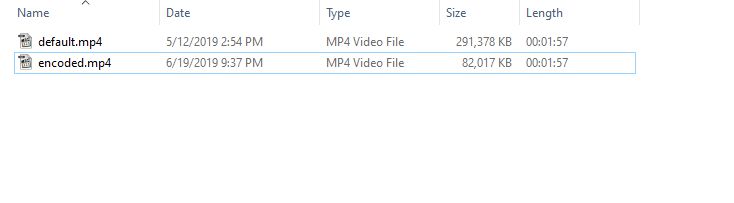
Step 6: Reduction of Video file size
You can see, the 2-minute video file of my lovely cats spending some good time together reduced to only 80 MB or so, from 284 MB. It is around 255% reduction, without losing any eye-perceivable quality, and that is really impressive.

Step 7: Handbrake Video comparison
Here is a snapshot of the two videos running side by side, where the left one is the recorded video, and the video on the right side is compressed. Though the difference in quality might not be that visible properly to you, hope you can understand, there is very less or no impact on the quality.

If you need more compression, you can change the default settings, which can save more space at the cost of the video quality, however. Depending upon the output format, chosen video codec, and other aspects, the compression ratio can be better or worse and you should always choose the appropriate settings only as per your requirements.
So that was all about using Handbrake to reduce video file sizes without compromising video quality. Do you have anything to say? Feel free to comment the same down below.
Other articles:
Related Posts
6 Best Free and Open-source Alternatives to WinZip & WinRAR
10 Top Best Free & Open Source Social Network Platforms to Start Your Own
How to install Winget package manager in Windows 2022 Server
How to View Listening Ports Using Netstat
How to Install Pygame Zero on Windows 11
Single Command to install Android studio on Windows 11 or 10