With the increase in demand for AI technology in every field, how coding can be left behind? To speed up the coding process and productivity of the developers GitHub came with an AI-powered coding assistant called Copilot. With the help of Open AI, Github’s Copilot provides code suggestions, autocompletion, and even generating entire code snippets. Well, unlike GitHub’s platform for storing source code repositories, this AI assistant is not free. It is available in two plans one is for individuals at $10 per month whereas the other one is for Businesses at $19 per user/month.
Here are some key features of GitHub Copilot:
- Automatically complete code as you type.
- Generates entire code snippets, functions, or classes based on natural language descriptions or comments you provide.
- Understands various programming languages, libraries, and frameworks.
- Can help you write comments and generate documentation for your code.
- Copilot can simulate pair programming by suggesting code improvements, offering alternative solutions, and helping identify potential bugs or vulnerabilities.
- Learns from the code you write and the corrections you make.
- Developers can customize Copilot’s behavior by defining coding styles.
- Copilot allows seamless integration with Visual Studio Code, Visual Studio, JetBrains, and Neovim.
Those who are using Visual Studio Code can integrate GitHub’s Copilot seamlessly with the help of an extension. In this tutorial, we will guide the steps required to enable GitHub Copilot in Visual Studio Code. Learn – 4 Best tools to install WordPress Local on Windows without Xampp
Enabling VScode GitHub Copilot
Prerequisites
Integration of Copilot in VScode doesn’t require any unique specification, just the common ones that would already be with you, here are those:
- Visual Studio Code: Of course, Vscode must be on your Windows 11/10, macOS, or Linux system. If you don’t have then can get it from its official website: Visual Studio Code Download. Linux users can see our tutorial to Install Visual Studio code on Ubuntu.
- GitHub Account: You need a GitHub account, sign up for free at GitHub if you don’t have one.
- GitHub Copilot Subscription: While writing this article Copilot was not free for users, so to use it you must need a paid or trial subscription service.
Here are the step-by-step instructions to enable GitHub Copilot in Visual Studio Code:
Step 1: Install Visual Studio Code
Those who don’t have VScode yet can download it from its official website as per the operating system they are using. However, if you are on Windows 11 or 10 then can get it using a simple command. Just open your PowerShell as Admin and run: winget install vscode
Step 2: Open VSCode
After installation or for those who already have it, launch the Visual Studio Code on your PC which can be done simply from the Application area. Upon opening this code editor you should see the VS Code welcome screen.
Step 3: Install the GitHub Copilot Extension
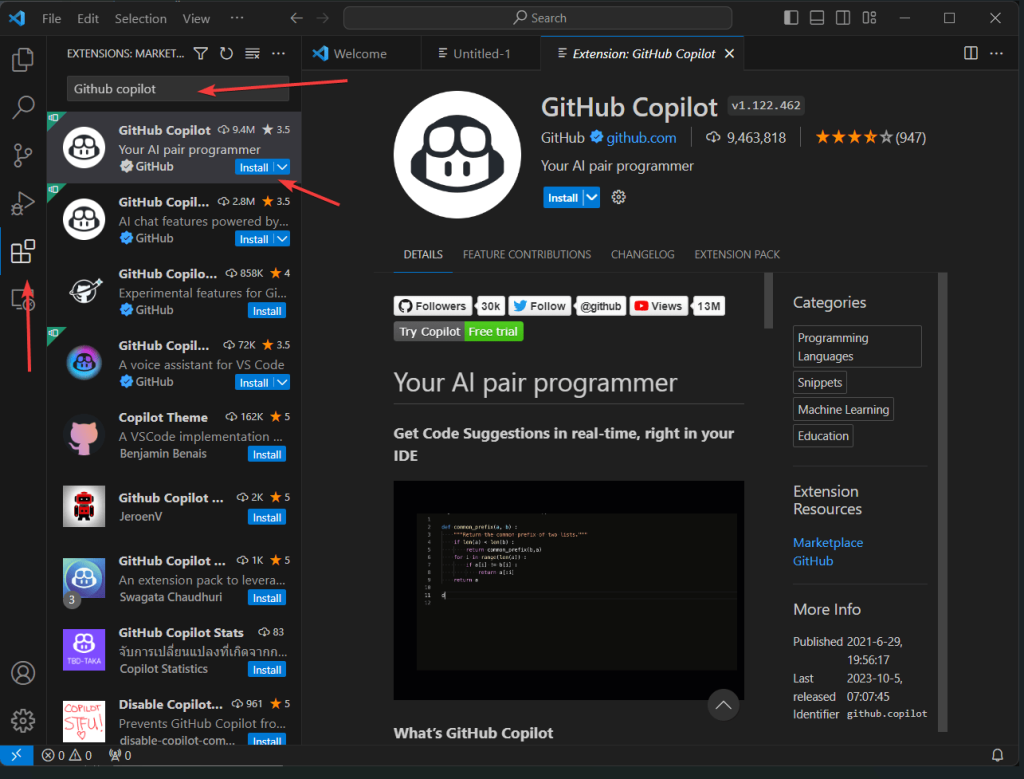
Out of the box, you will not find the Copilot feature in the VSCode, we have to add that with the help of the official GitHub Copilot extension, follow these steps:
- In Visual Studio Code, either click on the icon given for Extensions on the left panel of the code editor or use the keyboard shortcut
Ctrl+Shift+Xon Windows/Linux orCmd+Shift+Xon macOS). - On the Extension window, go to the search box and type “GitHub Copilot“.
- Soon, in the search most probably at the top you will find the GitHub Copilot extension, now click the “Install” button.
- Wait for a few seconds and the extension will be on your VScode.

Step 3: Sign in to Your GitHub Account
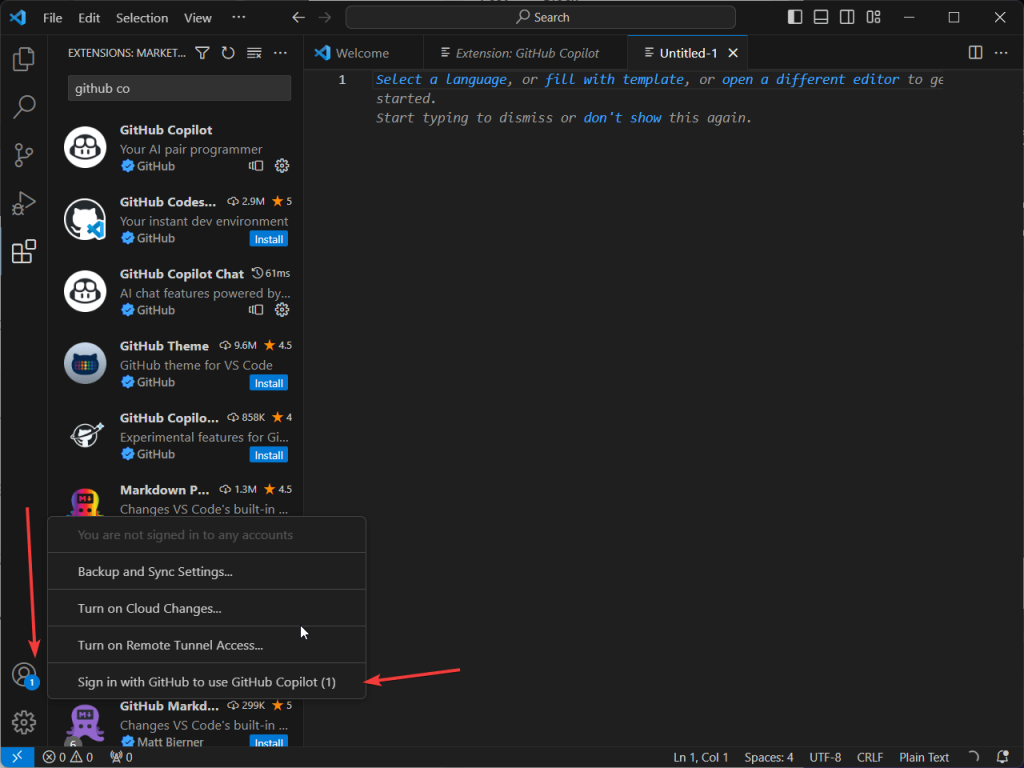
To enable GitHub Copilot, you need to be signed in to your GitHub account within Visual Studio Code. Also, we are assuming that you already have subscribed to one of the Copilot paid plans. Here’s how:
- Click on the “Accounts” icon situated in the lower-left corner of the VS Code.
- After that, you will see the “Sign in to GitHub to use GitHub Copilot” option, click that.
- A web browser window will open, prompting you to log in to your GitHub account. Enter your GitHub credentials and click “Sign in.”
- Once you’ve successfully signed in, close the browser window.

Step 5: Using GitHub Copilot
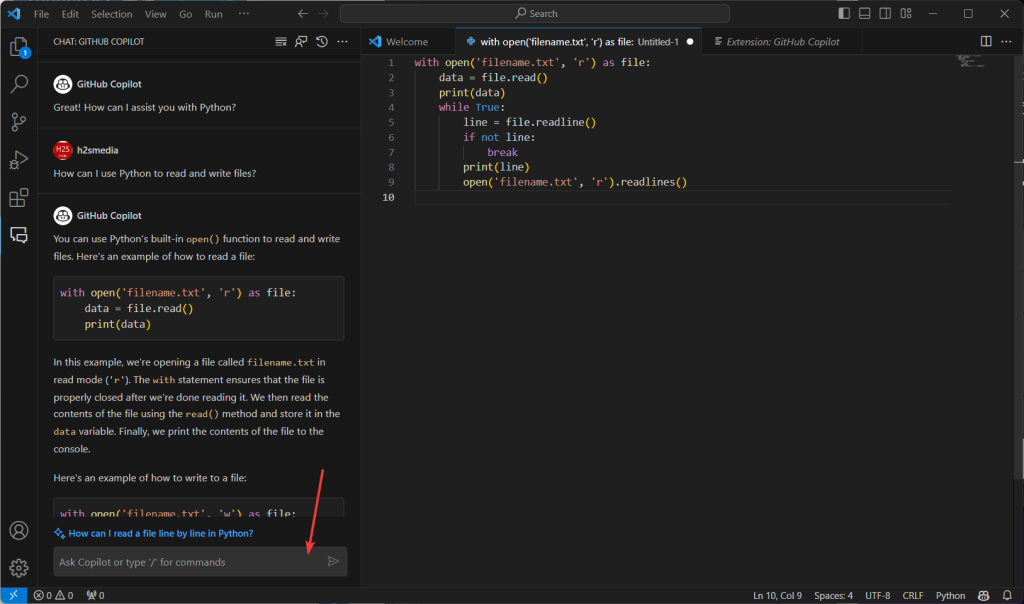
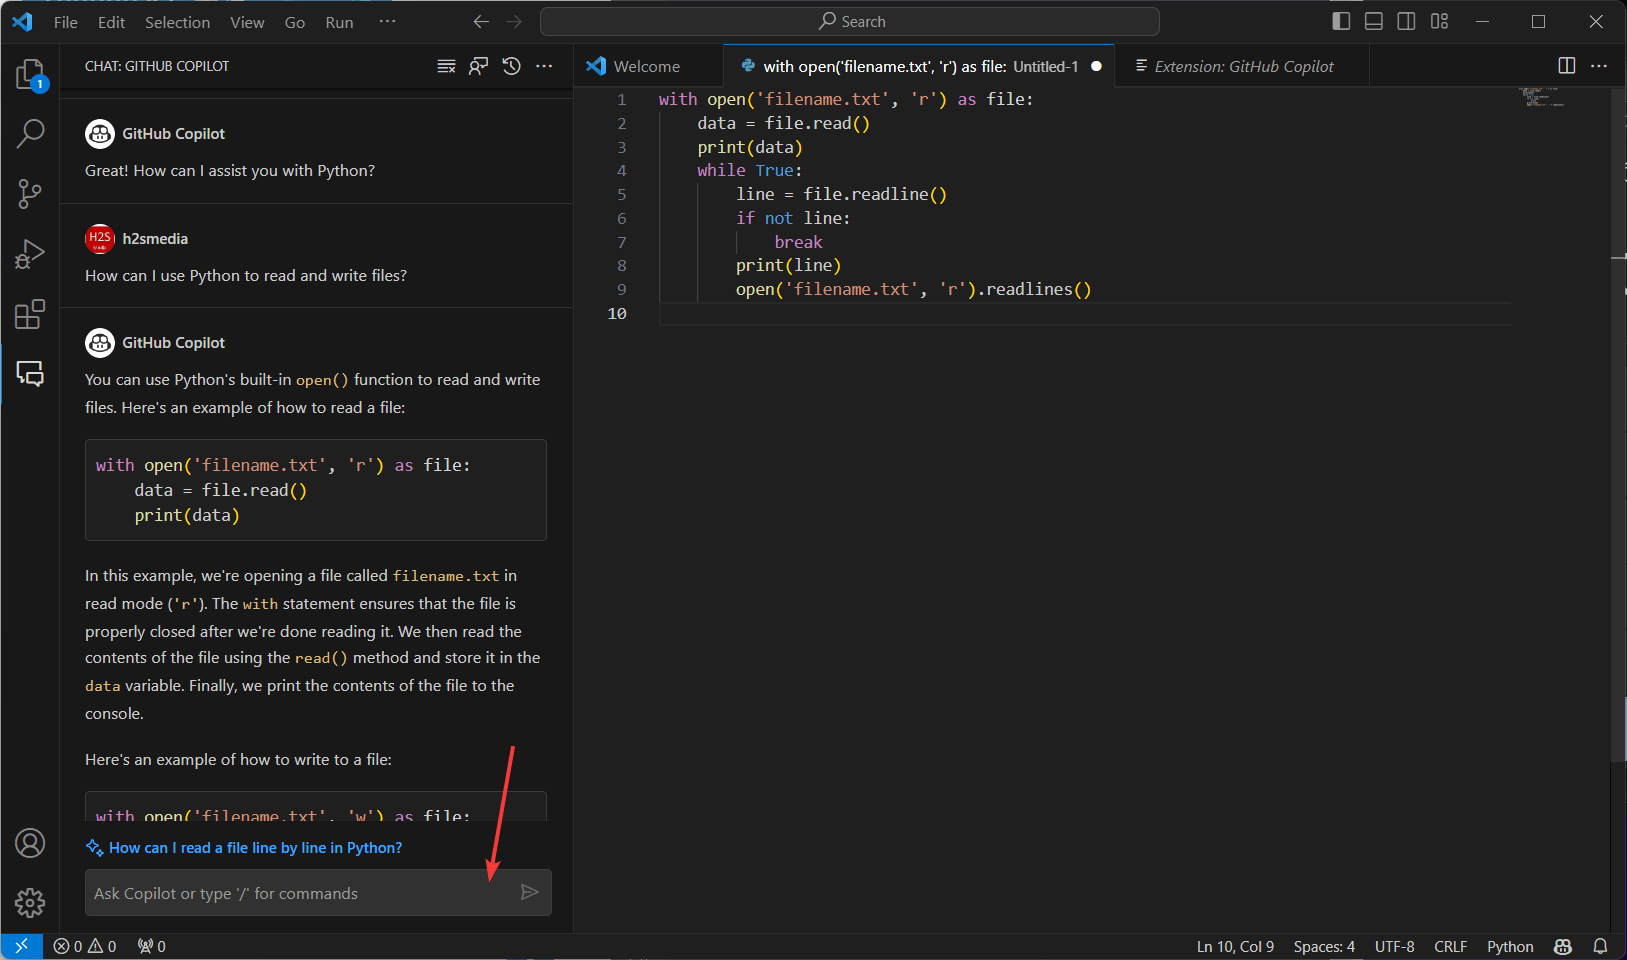
We have successfully enabled GitHub Copilot for our VS Code editor, now we can start chatting with AI assistants to create codes and solve various other problems. We can directly ask for our problems to AI from the code editor window by pressing the Ctrl+I buttons.
Also, as you write code in Visual Studio Code, GitHub Copilot will provide suggestions, and autocompletion, and even generate entire code snippets based on your context and coding style.

Conclusion
Although GitHub Copilot is not a free feature yet available at a reasonable amount for developers. It can significantly enhance the productivity and coding experience. hope this article has helped you somehow to set up and use GitHub Copilot on Visual Studio Code.
Other Articles:

Related Posts
How to Archive a WhatsApp Conversation Without Deleting
How to Clear or Delete Archived Emails in Gmail
How to Clear Google Search History?
2 best Android Apps to open zip or archive files on the smartphone
How to use the XLOOKUP function in Microsoft Excel with Example
How to set up an out-of-office responder on Gmail? Step-by-step guide on setting up a Vacation responder